Pages

Monday, October 21, 2013

Mini Mexican Stuffed Peppers

I bought a large bag of mini colored bell peppers at Sam's club last week hence my last post of grilled peppers and this one of baked stuffed peppers.  They are a versatile ingredient - I guess I was just in the mood to stuff them with goodness!

This recipe can be easily modified and adapted depending on the flavors you are in the mood for.  In this version, I mixed some quinoa (I'm on a quinoa kick) with refried beans.  You can easily do this with rice instead of quinoa and even try black or pinto beans instead of refried.  I also went vegetarian since I ate them as a side with baked chicken but you could opt to add meat or chicken to the filling as well if you wanted this as your main and are inclined to always have meat in your main.  I love a recipe where the options are endless!

Stuffed Mini Peppers
Time: About 40 minutes

Ingredients:
4-6 mini bell peppers (found in the refrigerated section of grocery in a plastic bag)
1 tsp olive oil
1/4 cup chopped onion
1 garlic clove minced
1 can refried beans (I used chipotle flavor)
3 tablespoons salsa (I used corn salsa)
1/2 cup quinoa cooked
1 jalapeno seeded and chopped or 1-2 canned green chiles chopped (optional)
1/2 cup shredded cheddar cheese

Note: this makes way more filling than you need - I made two batches with this amount. You can also use left over filling for burritos or nachos the next night.

Directions:
Preheat oven to 375 degrees.

Cut tops off peppers and slice in half lengthwise stopping before you cut all the way through.  Remove seeds and membrane.

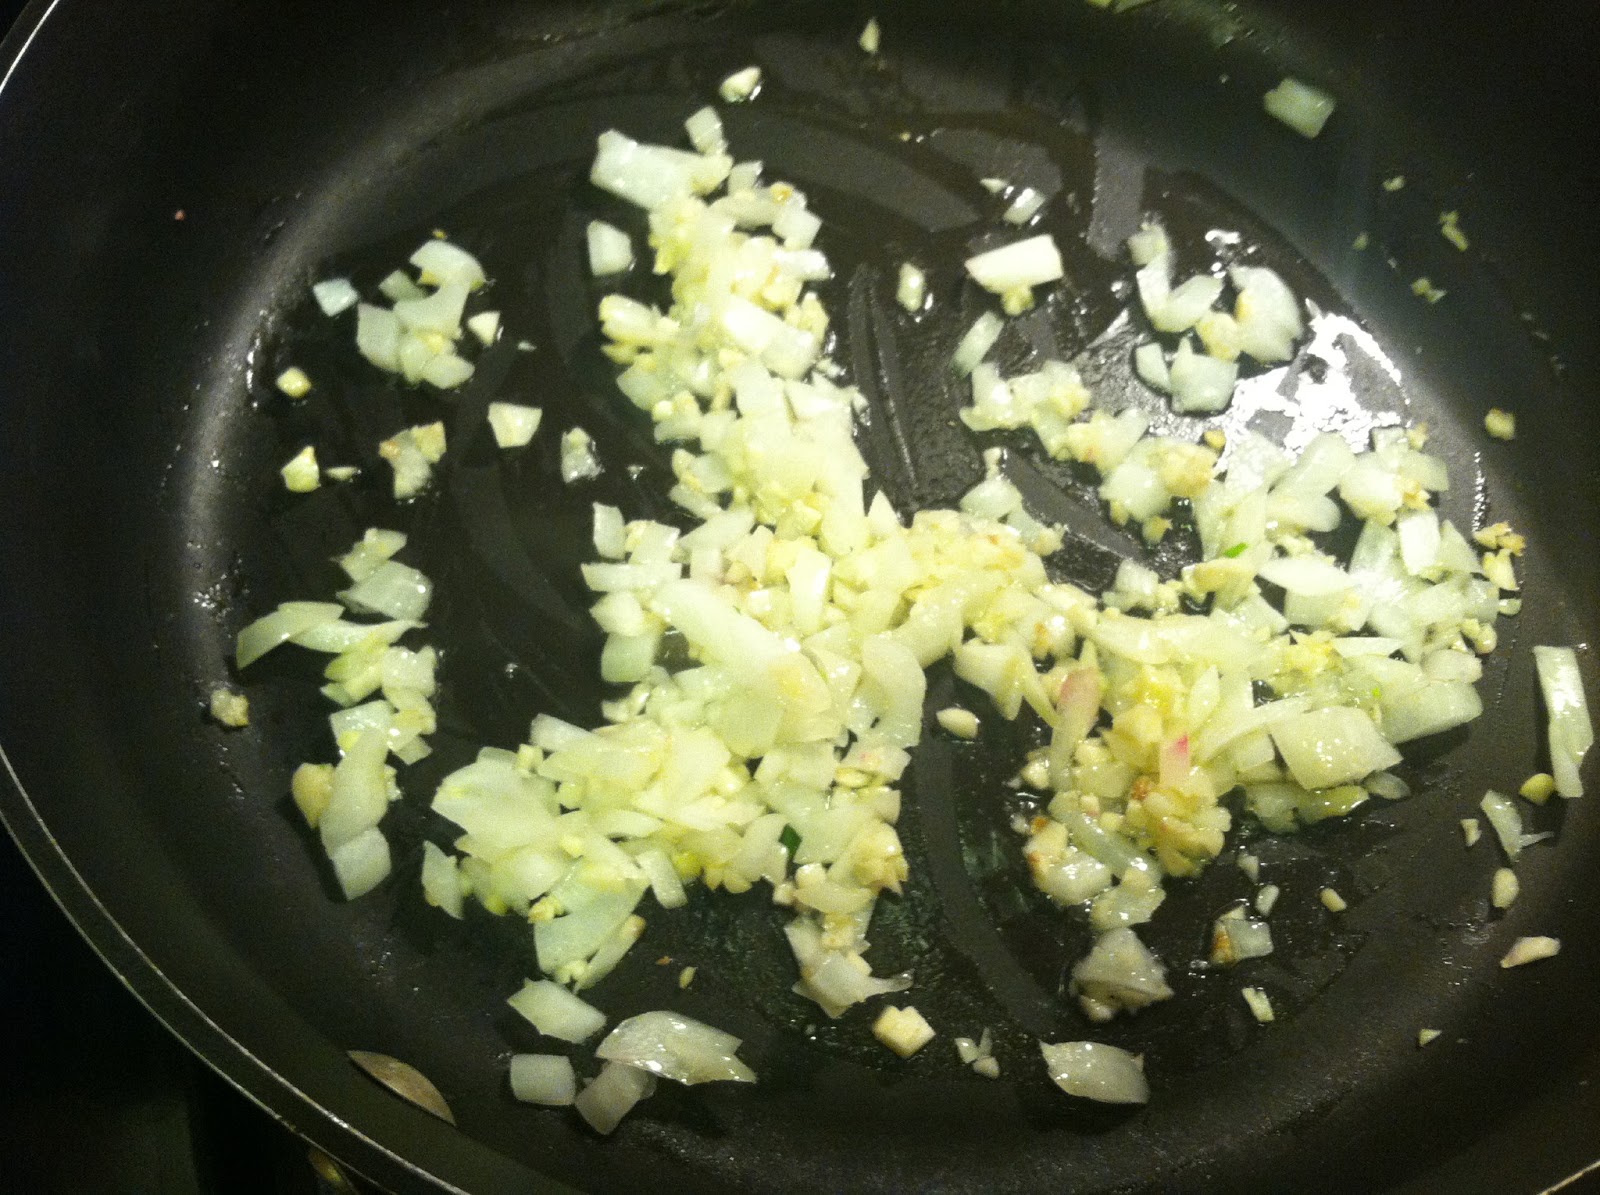
Heat olive oil in small sauce pan.  Add onion and garlic and cook until soft.  Add beans, salsa and quinoa and jalapeno and cook until warm.  Remove from heat and cool until mixture is safe to handle.


Spoon mixture into each pepper so that you can still kind of close the pepper.  Place peppers on baking sheet and sprinkle each with cheese.  Cover and bake in preheated oven about 25-35 minutes until peppers are soft. 

Enjoy that yummy goodness with chips and sour cream! (sorry about the lame pic)


Monday, October 14, 2013

Cheezy Grilled Stuffed Peppers

My Mother-in-law made these this past summer when we were visiting.  Let me say, they are soooo incredibly simple and very delicious! Perfect to serve as an appetizer while you are waiting to grill up the main event! The great thing about these are you can make as few or as many as you'd like.  It's very easy to scale up or down on the short ingredient list.

Ingredients:
Small sweet bell peppers (you can find these in the refrigerated section at the grocery store, they usually come in a package with a bunch together)
Laughing Cow Queso Fresco & Chipotle Cheese
Bacon
Toothpics

Directions:
Heat up grill.

Slice the tops off each bell pepper.  Next, slice down the middle lengthwise but do not cut all the way through to make two pieces, keep the other end in tact as it is easier to keep the cheese in.  Using your knife, cut out the seeds and membrane of the peppers.

Stuff each pepper with laughing cow cheese.  I used about half a wedge for each pepper.  They do not need to be completely stuffed throughout the inside, just enough to get it all around to you get some cheese in each bite.

Take 1/2 or 1 piece of bacon (depending on the size of the pepper) and wrap it around the pepper covering as much surface area as you can.  Secure the bacon and pepper together with a toothpick.

Once all peppers are assembled, grill them on the grill about 4-5 minutes per side or until bacon is cooked completely and crispy on the outside.  Enjoy!  Oh, make sure to watch the toothpicks as you do so!

Pic below... I almost forgot to take a pictures because we devoured these so fast :-)

Tuesday, July 2, 2013

Taco Salad with Easy Taco Shell Bowls

It has been a while since my last post and mainly because I've been so busy that most nights I've found my weeknight meals are quickly thrown together without a thought to grabbing my camera.  Last night I felt a tinge of creativeness, so I'm back! I had a hankering for taco salad.  Who doesn't love the savory combination of ground beef simmered in spices, guacamole, sour cream, corn and black beans atop a bed of lettuce??? Y U M.

I wanted to see if there was a way to make my own crunchy taco shell bowl.  I don't own once of those handy dandy infomercial ones but thought surely I could make it using something from around the house right? A quick internet search produced this super easy and very clever method.  Simply wrap foil over the top of clean cans and lay tortillas on top, then bake in the oven.  The result was a deliciously crunchy taco shell, perfect as a vessel for the taco salad! It's too easy not to try.


Taco Salad
Serves 4
Time: 30 minutes

Ingredients:
4 clean cans wrapped with aluminum (easy when you used canned stuff for the salad)
Pam cooking spray
4 flour tortillas (I used 10 inch)
1/2 large onion chopped
1 lb ground sirloin
1 packet taco seasoning
1 14.5 oz can diced tomatoes
1 can black beans drained and rinsed
1 can corn drained
guacamole
sour cream
shredded cheese
chopped onion, tomatoe
salsa

Directions:

Preheat oven to 450 degrees. Place cans on baking sheet.  Spray both sides of room temperature tortillas with cooking spray.  Drap tortillas over cans.  Bake in oven for 8-10 minutes or until golden brown and crispy.

Meanwhile, saute onion in large skillet for 2-3 minutes.  Add ground sirloin and taco seasoning packet.  Cook until meat is browned about 5 minutes.  Add diced tomatoes and simmer 5-10 minutes.

I like to put out all the ingredients so each person can assemble their own taco salad.  Then you can get the right ratio of all the yummy ingredients!  So fun, so delicious and so easy!


Sunday, April 28, 2013

Simple Pasta Salad

I love throwing together a simple pasta salad when I know I'll be grilling.  It's an easy and filling side dish that you can do ahead of time which is always a plus!  This version is based off Greek flavors which I think are always bright, light and savory.  You can easily add or sub out ingredients to suite your mood.

Here's the one I made this time:

Simple Pasta Salad
Serves 4

Ingredients:
1/2 lb rotini pasta
2 T chopped kalmata olives
2 oz crumbled feta cheese
1 small green onion chopped
1/4 cup red onion diced small
1/2 pint cherry tomatoes, halved
2-3 T Italian Dressing (I used Newmans Tuscan Italian)

Directions:
Cook pasta according to package, drain and set aside to cool completely.

In a bowl mix together ingredients through tomoatoes.  Once pasta cools, add to the bowl of ingredients and toss with dressing.  Make sure pasta is cool or you will melt the cheese.

That's it - how easy!!! 


Wednesday, February 27, 2013

Cheesy Pasta Shells & Broccoli Bake

When it is cold and rainy out, as it has been here for the past few days, I crave some good comfort food.  Nothing better than a cheesy, noodle bake to satisfy the craving! I threw together many ingredients I had on hand to make this rich and satisfying take on macaroni and cheese.  It's a bit away from the traditional mac & cheese but yummy nonetheless and I think even better the next day.  Give it a whirl!


Cheesy Pasta & Broccoli Bake
Time: 45 mins
Serves 6

Ingredients:
2 cups mini shells pasta or other small pasta
2 large garlic cloves minced
3/4 cup chopped yellow onion
1/4 cup butter
1/4 cup flour
1 cup 1% milk
4 green onions, white and green parts chopped
3/4 cup chicken broth or vegetable broth
6 oz Velveeta cheese
4 oz. 1/3 less fat cream cheese
1 bag pre-chopped steam in bag broccoli
1/3 cup shredded parmesean cheese
1/2 cup panko bread crumbs
2 T chopped chives

Directions:
Preheat oven to 350 degrees.

Cook pasta according to directions, drain and set aside.

In large skillet with sides, melt butter over medium heat and saute onions and garlic for about 2 minutes.  Sprinkle flour over butter, stirring with a wisk until thick and pasty.  Add milk and continue to stir constantly until milk is bubbling and sauce is thickened.  Add green onions, chicken broth, Velveeta and cream cheese and stir until cheese is melted.


Meanwhile, microwave broccoli according to directions on bag. Note: I find they tell you WAY too long for the broccoli so I do for about 1 minute less than directions.  You can also add the broccoli to pasta water during last three minutes of cooking to boil it.

Remove cheesy mixture from heat and stir in broccoli and pasta.

Spoon mixture into 11x7 baking dish.  Sprinkle dish with parmesean cheese, then chives, then panko.  Bake uncovered for about 30 minutes or until panko is lightly browned.


almost done with cheese and chives
panko to top it off!


ENJOY the cheesy goodness!!!

Wednesday, February 13, 2013

Chicken, Andouille Sausage & Shrimp Gumbo

I consider myself quite lucky that my hubby was born in New Orleans and still has family that lives in Louisiana.   My mother-in-law grew up in Louisiana and still cooks amazingly delicious dishes from the region.  This recipe is loosely based on the gumbo recipe their family often uses and it is awesome! If you've never had andouille sausage, a word of warning it is SPICY.  If you are sensitive to the spicy you might want to sub in smoked sausage.  I was intimidated and a bit scared to try this recipe as it does take time and it might seem difficult but don't let the steps scare you - it's pretty easy! From start to finish however, it does take about an hour and a half.

Without further ado, here's the recipe with a few step-by-step pictures.

Chicken, Andouille Sausage & Shrimp Gumbo
Serves 8

Ingredients:
2 1/2 lbs bone-in skin on chicken breast (alternatively you can use 2 lbs boneless, skinless or rotisserie chicken to cut down on time)
10 cups water
1 lb Andouille Sausage sliced then quartered
1 large onion chopped
1 bunch green onion, white and green parts chopped
1 large green bell pepper chopped
5 cloves garlic minced
1 1/2 tsp dried thyme
1 tsp cajun seasoning such as Tony Chachares
About 1 tsp ground black pepper
1 box Zatarains gumbo base (see picture)
1 can diced tomatoes
3/4 lb shrimp, peeled, deveined and tails off
Hot cooked white rice for serving


Directions:

Place chicken in stock pot and boil until done about 25-30 minutes for skin on, bone-in.  Remove chicken from water and set aside to cool.  Scrape any fat off the top of the water once cooled and reserve water.

In a large pot or dutch oven, cook sausage until done about 5-8 minutes.  Remove sausage and set aside.  In the same pot, add onions, bell pepper, thyme, creole seasoning and pepper and saute until vegetables are soft.


While veggies are cooking, remove skin from chicken breast and shred the meat into bite sized pieces.

Add reserved chicken water to the pot with veggies and add the box of Zataraines, stirring until the seasoning is dissolved in the water.  Add chicken and sausage to water and bring to a boil then reduce to a simmer.  Simmer for 20 minutes, add shrimp and bring back to a boil then reduce to low and simmer for another 15 minutes until shrimp is cooked.


Serve over white rice, now enjoy y'all! Remember it's spicy!!!!


Wednesday, February 6, 2013

Roasted Beets & Sauteed Beet Tops

I actually made it to the farmers market this weekend - a feat that is too few and far between these days! The produce stand had lovely bunches of fresh beets for sale.  I've never tried roasting beets myself and thought why not try.  The nice man at the produce stand told me that the beet greens were actually very good as well when sauteed with garlic and olive oil.  That night I roasted the beets up, sauteed the greens and served them alongside some Gorgonzola and pancetta raviolis (also fresh from the farmers market and DIVINE!).  If you have not tried making these purple veggies I would urge you to try, they are sweet, satisfying and good for you!

A word about the beets.  I read that you can first peel the beets and then roast them however the beets I had were quite small and it would have been really difficult to use a peeler on them.  Instead, I wrapped each individually in foil - grouping the smallest together in groups of two - added a little olive oil, salt and pepper.  Once they were done roasting, I peeled afterwards which I think was easier than before with the little guys.  Again the peeler was too difficult with the small ones so I ran the knife around the outside and the peel came right off.

Bake the beets in a 400 degree oven for about 25-45 minutes depending on the size of the beets.  When they are tender and soft when poked with a fork, they are ready!


For the tops, make sure you trim the stems off as those are not pleasant to munch through. Wash thoroughly to remove all the dirt.  Heat skillet or pan over medium-high heat.  Add 3 teaspoons chopped garlic, 1/2 cup chopped onion and 1/4 cup olive oil.  Saute the greens until they are wilty and soft.  Season with salt and pepper.  The texture is much like collard greens or kale so the more they cook, the softer they will become.  They also have a bitter taste so are delicious paired with something a bit rich and creamy.
onion and garlic

chopped leaf tops
sauteed tops